Documentation
For System Managers
Note: You need to be logged in as a system manager for everything in this section.
Creating and managing the subject hierarchy
All of the operations following below are carried out on the Administration / Subjects page in the Schema block of options.
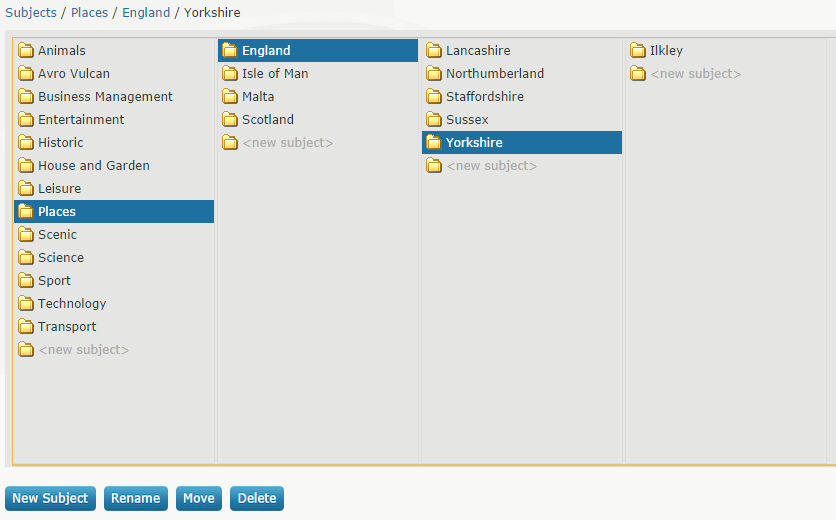
The page shows any existing top level subjects and a button to add a New Subject. At the bottom of the list of subjects there is a folder icon <new subject>.
Clicking a subject will show to its right any lower level subjects that it has. Each lower level subject can be clicked in the same way to display any lower level subjects.
The illustration below shows what is seen, in this example, if the top level subject Places is clicked, then one of the second level subjects England is clicked, then one of the third level subjects Yorkshire.
Note that there is <new subject> folder icon at the foot of each list.

Adding subjects
Creating a new top level subject
Click the New Subject button or double click the <new subject> folder icon at the foot of the list of top level subjects. Enter the subject name and click Save.
Creating a new second or lower level subject.
The ‘New Subject’ button always operates on the lowest level visible on the page. It’s easier though to click <new subject> at the foot of the level you want to add a subject to.
Enter the subject name and click Save.
Renaming subjects
Either click on a subject then click the Rename button, or double click the subject name.
Make changes then click Save.
Moving subjects
Click on a subject then the ‘Move’ button. Click on the subject to move it to – clicking through levels as required – then click the ‘Move Here’ button. This will also move any lower levels under the moved subject.
Deleting subjects
Click on the subject to delete then click the Delete button. This will also delete any lower levels under the deleted subject.